
Things tend to break all the time. Of course, you might think that buying a quality item (in this case, a quality LED display panel) will prevent this from happening. And it will, for a few months or even a few years. But no matter how well you take care of something, things tend to wear down, especially after long periods.
And unfortunately, accidents can happen too. If you have an LED display panel outside, the chances of your display breaking down are much bigger than if your display were to be indoors. This risk is mostly caused by various conditions, such as rain, snow, hail, wind, and so on.
But don’t think that indoor LED displays can’t get damaged due to accidents too. Accidents can happen when cleaning your panels or during maintenance controls.
Now, when you see your LED display not working, it’s only natural to panic. Quality LED wall displays can get pretty pricey, and you don’t want to replace the whole display. But even getting your display fixed can get pretty pricey.
So then, what can you do to get your LED wall panel to work again? Find the Source of the Issue!
1. Common Failures and Solutions of LED Module
No Displaying on a single LED Module
(1)Check whether the power supply contact is normal. For instance, whether the power plug is loose or not.
(2)Input Signal cable not connect well, Reconnect the input signal cable(flat cable).
(3)Input Signal cable breaks down, Change the input signal cable(flat cable).
(4)If the problem still exists after replacing the flat cable, check whether the interface of the PCB board is working properly.
Non displaying on part of the module such as rows missing and lines missing
(1)Check whether the flat cable connects well with the power line of the first abnormal LED module in the direction of signal input.
(2)check whether the signal input is normal. If there is confusing color, then check the signal contact of the first abnormal LED module in the direction of signal input. You can examine it by plugging in and out multiple times. If there is a problem, you can choose to replace the flat cable.
(3)Check whether the power pins of the 74HC138 decoding chip and 4953 line management chip are poor welding or suffering short circuits. If yes, repair them or change new chips.
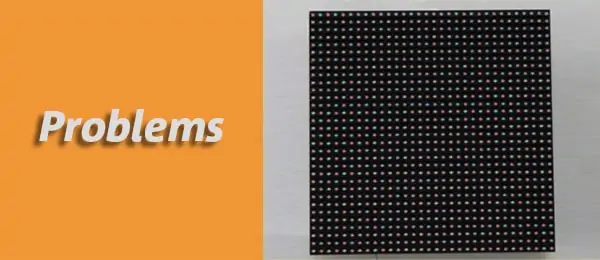
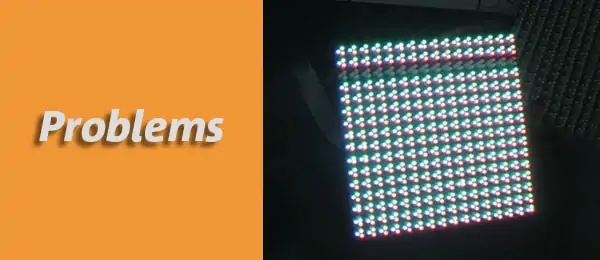
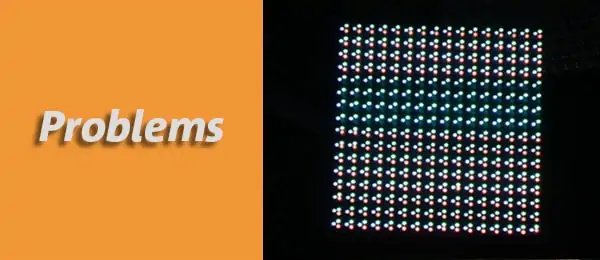
Single Pixel Missing, Dark, or Twinkling (for Static Screen)
![]()
Use the X1 resistance function of the multimeter to detect whether the LED lamp beadwork normally or not.
Connect the positive electrode of LEDs with the black probe and the negative electrode with the red probe. If the LED lamp bead is on, means it still works. If the light bead doesn’t light on, means it is bad. Then you have to replace it.
No Displaying on Several Modules

(1)Signal cable not connect well (No displaying on a row of modules), Check the signal cable connection and reconnect, also check the power supply for the first module in the row.
(2)Power supply not connect well (no displaying on one corner of a cabinet), Check if the related power supply is working normally and the connection is good.
Color missing on LED module
(1)Check the signal cable connection and reconnect, also check the power supply for the first module in the row. (2)Check whether the flat cable is working normally. If any problem, reconnect the cable. (3)Change a LED display module to see whether the color missing phenomenon disappears.
One row of LED display module displaying color inconsistency
This problem may be caused by the failure of the pins of the driver IC that controls this row. First, position the corresponding driver IC. You can find it through the circuit diagram, and replace it and drive it.
PS:
How to replace driver IC? First, test the IC card. Second, remove the defect IC. Third, add solder. Fourth, get rid of excess solder. Fifth, test it.
How to replace LED lamp bead? Remove the gel around the LEDs with sharp tools such as a tweezer until the pins are exposed.
Use a tweezer to keep the lamp bead in place, and solder it with soldering iron at a temperature around 220°C (too high a temperature will damage the LED display) for less than 3 seconds.
Install the right light beads on the PCB board (the long probe of the LED lamp bead is the positive electrode, and the short one is the negative electrode. And the square hole on the PCB board is for the positive electrode while the round hole is for the negative electrode).
Meltdown a little solder wire and touch it with the solder tip, then solder the LEDs and PCB board with the solder wire. Finally, seal the LED display with the same type of gel.
2. Common Failures and Solutions of LED Cabinet
No Displaying on Single Cabinet
(1)Power supply breaks down, Check if the power supply of cabinet is working normally.
(2)Receiving Card break down (No displaying on the last cabinet), Check if the receiving card is working normally (green indicator twinkling, red indicator keep lighting). If the green indicator is off or keeps lighting, it means there is no signal (if the indicator is off, it may be also because its power is off). If it truly breaks off, please change the receiving card.
(3)Signal cable connected wrongly, Check the signal cable connection between cabinets and reconnect.
3. Common Failures and Solutions of LED Display
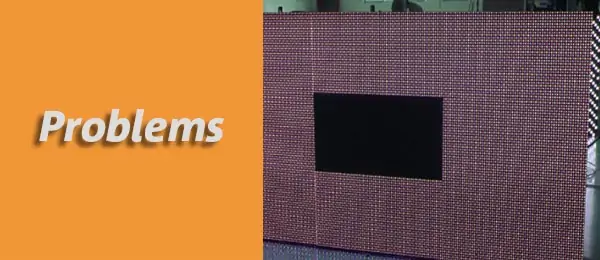
No displaying on the entire LED display (all black)
(1)No AC power input, Check whether the LED display screen has already been powered on. Turn on the swift of the power distributor, the power indicator should be on.
(2)Signal cable break down (internet cable), Check the signal cable, Reconnect it until the green indicator twinkling as normal.
(3)Controlling System break down(Sending card), Examine whether the connection between LED sending card and LED receiving card is normal.
If the sending card is not working normally, for example, the green indicator is off or keeps lighting, it means there is no signal, then check it to find out problems or replace it.
(4)PC is not started up, Start up the PC, open the LED studio software.
(5)DVI cable not connected, Check the DVI cable, Power off the computer, and reconnect the DVI cable.
(6)Find out whether is a mistake in the setting of the DVI card. According to the right steps of controlling system operation, setting up the LED studio software and reconnect the signal cable.
(7)Check the HUB to judge whether it is working normally.
Garbled displaying on the LED display
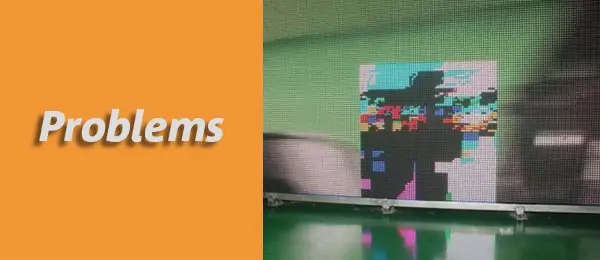
(1)Check out whether the connection between receiving a card and sending a card is normal.
If the sending card is not working normally, for example, the green indicator is off or keeps lighting, it means there is no signal, then check it to find out problems or replace it.
(2)Ensure the internet cable is appropriate and will not influence the displaying performances due to bad quality and inappropriate parameters.
(3)Check whether the LED studio setting has a mistake or not. If there is any problem, setting up the LED studio software and reconnect the signal cable based on the controlling system operation steps.
Disordered or Overlapped Displaying on the Entire LED Display

(1)Check the connection between cabinets and signal cable. Replug the cable or replace it.
(2)Check the DVI cable which connects the multi-media card and sending a card. If there is a problem, reinforce the connection.
(3)Check whether the LED studio setting has a mistake or not. If there is any problem, setting up the LED studio software and reconnect the signal cable based on the controlling system operation steps.
(4)Check the working conditions of the LED sending card. If they do not work properly, choose to repair or replace them.
Winkling/Shaking displaying on the entire LED display
(1)Check whether the sending card and receiving card are working normally. If the green indicator is off or keeps lightning it means there is no signal.
(2)Ground wire breaks off. Check out whether there is a problem of connection between the ground wire and the LED screen display.
(3)Check the connection between cabinets and signal cable. Replug the cable or replace it.
(4)Check whether the LED studio setting has a mistake or not. If there is any problem, setting up the LED studio software and reconnect the signal cable based on the controlling system operation steps.
(5)Check the DVI cable which connects the multi-media card and sending a card. If there is a problem, reinforce the connection.
No displaying on parts of the entire LED display

(1)Check whether the sending card and receiving card are working normally. If the green indicator is off or keeps lightning it means there is no signal.
(2)Check whether the LED studio setting has a mistake or not. If there is any problem, setting up the LED studio software and reconnect the signal cable based on the controlling system operation steps.
Not displaying synchronously with the computer
Check the DVI card setting, and the multiple display mode should be “duplicate”.
Each display unit performs the same content
This may be caused by the lack of cascading files. Send the cascading file again, and plug the internet cable of the computer into the output port near the indicator lamp of the LED sending card.
The brightness of the LED display screen is low, and pictures are fuzzy
The reason can be the wrong setting of sending card and functional card. Please restore the default setting and store the setting, and control the minimum brightness values larger than 80.
No displaying on several modules
(1)If there is no displaying on a single row, it may represent the signal input has some problems. Check it, replug it and also check the power connection for the first module in the row.
(2)If there is no display on one corner of the cabinet, check if the related power supply is working normally or not.
Garbled displaying on the LED display only a few seconds when powering on the screen
This is a normal phenomenon that represents the LED display board is ready to work. This garbled displaying will disappear basically within two seconds and the screen will run normally then.
4. Troubleshooting Steps of LED Control System
(1)Check the setting of the graphic processing unit according to guidance.
(2)Check the connection of cables such as DVI cable, internet cable, the connection of host control card and PCI port, and so on.
(3)Check the power supply of both the control computer and the LED display screen. When there is an inadequate power supply for the LED display cabinet, the screen will flicker when the screen displaying the whole white picture.
Choose the right power supply based on the requirement of the cabinet.
(4)Check whether the green indicator of the LED sending card is flashing regularly. If it is flashing, then turn to step 6.
If it does not flash, restart it, and check whether the green light is flashing regularly before entering the win98/2k/XP system. If flashing, go to step 2.
Please check whether the DVI cable is connected properly. If the problem is not solved because of sending a card, graphics card, and DV cable, please replace it separately and repeat step 3.
(5)Setting upon the software instruments or reinstall it, and then reset it until the green indicator is flashing. Otherwise, repeat the third step.
(6)Check whether the green indicator (data light) of the receiving card flashes synchronously with the green indicator of the sending card. If yes, go to step 8, and check whether the red light of the power supply is still on.
(7)Check whether the internet cable is well connected or the length of it is too long. Please be noticed that the length should be within 100 meters without a repeater. If the answer is yes, then cope with it.
However, if the problems are not solved after the repairment, then the trouble may happen in the LED receiving card. Replace the receiving card and repeat step 6.
(8)Check out whether the power lamp is on. If not, turn to step 7, and check if the port of the defined line is compatible with the unit board.
Find a Good Fix for Your LED Screen Problems
Now, let’s say you find the source of your LED wall issue. There are two possible outcomes after you do this. If you’re tech-savvy or if you have an in-house maintenance worker, then you can probably fix the issue yourself.
But oftentimes your LED screens problems can be more complex, especially with outdoor LED displays. In that case, the best solution is to hire a professional LED maintenance worker to check the whole display, troubleshoot the issue, and fix it.
Of course, as many people say, prevention is the best cure. So you shouldn’t wait for your LED panels to break drown. Instead, you should have a professional come and look at your LED displays regularly and perform maintenance check-ups. This will decrease the chances of your display walls randomly shutting down.
Bottom Line
Fixing up LED wall displays is not an easy nor cheap task. However, there are ways to prevent this from happening. You can always ask professionals to come regularly and check up on your displays, but the issues all stem from the LED screens.
If you will get low-quality LED screens, then of course that the panel will be prone to more breakdowns. But if the panel you purchase is of superior quality, then the chances of it breaking down are smaller.
Where can you find that kind of LED wall display? Well, you don’t have to look that far because we have them! You can contact us to find out which LED Screens would suit your business.